I literally move him somewhere every time that they are out of the room to keep it exciting! It's amazing how well they behave when he's watching!
We've also been busy working on our parent gifts. Our fabulous art teacher, Mrs. Holly Huber, came up with the idea to make these cutesy frames. They are just adorable!
Here's how it's done:
1. Glue 4 large craft sticks together to make a frame. I use hot glue to ensure that it holds!
2. Glue discarded puzzle pieces on to the frame, with the backside facing upward, so that the white part is showing.
3. Using a paintbrush, "paint" liquid glue on top of the puzzle pieces.
4. Sprinkle craft snow or glitter on top of the glue. Let it dry.
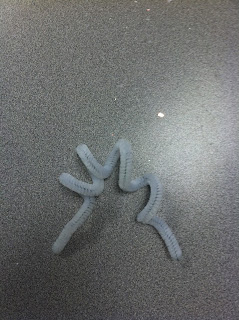
6. Next, use your finger to curl a chenille stem to make a hanger. It should look somewhat like this:
7. Put two dabs of hot glue on the top part of the frame and attach the hanger.
8. Cut a piece of scrapbook paper or construction paper the same size as your picture. Using a thin line of hot glue, glue the paper onto the back of the picture to create a pretty backing and support to hold the hanger.
That's it! Easy as pie, and sooo cute! :)
Back when I was teaching 3rd grade, I used to make these ornaments with my kiddos. They are a bit more complicated for small hands, but they turn out adorable! I know that I saw this idea somewhere years ago, but can't find a link to the step-by-step directions. If you know where it came from, please let me know so that I can give the creator some credit where credit is due! ;)
To make these ornaments, you basically follow the same steps listed above, with these modifications:
*Before gluing the pictures inside the cookie cutters, you will need to tie ribbon through the top of the cutter to create a hanger.
*Also, you will need to back the picture with foam board before gluing it inside the cookie cutter so that it will stay in place.
While I let my kiddos complete a lot of these steps on their own or with assistance, I make sure that their little fingers stay away from the hot glue. Please make sure that you do too! ;)
Finally, we always have a gift wrapping party, where I let my kiddos use pre-cut squares of paper to wrap their gift for their family. I show them how to tie a bow, and let them choose a tag to finish it off. They are always so excited to take their gift home to give to their loved ones!
I hope that you and your kiddos have a fantastic week!
Amy


No comments:
Post a Comment